A non-programmers guide to contributing to Standard Ebooks

Table of Contents
Part 1
Part 2
Part 3
Introduction ↺
Why this guide
Standard Ebooks is a project started by Alex Cabal that…
takes ebooks from sources like Project Gutenberg, formats and typesets them using a carefully designed and professional-grade style manual, fully proofreads and corrects them, and then builds them into a new edition that takes advantage of state-of-the-art ereader and browser technology. It is a volunteer driven project and if you are interested in adding to the availability of public domain literature or just want to learn about how ebooks are made, this is a great project to take part in.
The downside is that it is very programmer-centric. While admittedly, a lot of what you need to know/do for complicated projects is beyond the ken of your basic computer user, thankfully, with SE’s detailed instructions and the provided SE toolset, getting started on basic projects is well within the means of the average user. You just have to have a grasp of some basics first.
And that’s what this tutorial is all about. I think it would be great if more of the right-brained (I know…I know…) set became a part of the project and I thought I would see if I could lay out the basics.
Be sure to visit the Contributors page if you want see the various ways you can help out even if this guide still leaves you too nervous to give it a try.
Disclaimer
A lot of my terms and concepts are not going to be strictly accurate. For one, I don’t actually understand some of them myself, and for two, the analogies I offer are just that: analogies. You can do more research yourself if you really want to know more about what’s going on. My aim is just to demystify some of the more intimidating steps. Feel free to correct me if I am egregiously misleading anyone.
OS X-centric
I am a Mac user. Most of what I write here will be focussed on working with a Mac. There won’t be much difference if you are using Linux (but then I assume by dint of being a Linux user this guide won’t be as applicable to you) and if you are a Windows user the basics still apply but you will have to jump through some hoops and adjust your tools to suit the platform. SE itself recommends that if you are a Windows user that you would be better off installing Linux on a virtual machine. That in itself is going to be a big stopper for beginners.
Key concepts ↺
What it is?
A lot of what the Standard ebook project is about is creating a consistent, updatable and functional ebook. So a lot of what follows is just the basics of how that goal is met at the production level.
One of the keys to understanding how and why a Standard ebook is formatted the way it is, is realizing it is designed to be as accessible as possible — that means it can be used on multiple readers, including screen readers for the visually impaired. As an example, a computerized reader needs to be able to distinguish between the article “I” and the Roman numeral I — something our brains do automatically from context — so the underlying code you will be applying will be to make this distinction for the ereader to parse. If in the course of working on a project you are confused about whether to mark something up or not, a good touchstone is to ask yourself if a computer would be able to distinguish what it is without further context.
To make an ebook you are, at root, making something very similar to a website. One that is packaged according to some very specific rules. This means that a working knowledge of html and css is helpful — but don’t let that daunt you. You will also need to get over any nervousness you have regarding the command line prompt. That’s that thing that looks like an olde-tymie computer interface with a blinking prompt, where you have to enter arcane, and often incomprehensible, commands. Again, don’t worry — most times it’s simply a matter of cut and paste. You can figure out what the commands are doing later.
html, xhtml & css
Html is the “programming” language used to make web pages. Html stands for hypertext markup language and is the basic format that web browsers read. XML stands for extensible markup language and can be thought of as a “programable” version of html. The ebook is based on xhtml files which are, in a way, just a mashup of the two.
Html/xhtml has a few conventions you will need to know.
tags
Html is formed by surrounding text with tags. Each tag set has an opening and a closing tag. The web browser (or in this case ereader) reads the text between the tags and treats it according to the appropriate html rules. For example p, the tag that marks paragraphs is used like this:
<p>This is a paragraph. It may have all sorts of text in it.</p>
The text will then be displayed and treated as a paragraph with whatever settings (first line indent, space after etc.) that have been assigned to paragraphs. Unlike programs like Microsoft Word or other rich text editors, if you want something to appear bold or italics you will need to tag it e.g. <strong>This is strong</strong> and <em>This is emphasized.</em>. (for those of you with some olde-tymie experience with html <b> and <i>, bold and italics, have been relegated to specific semantic uses and aren’t the go-to’s anymore for highlighting text.)
Some common html tags you will need to know:
- emphasis:
<em>…</em>— is usually visually identical to, and used in place of, italics. - italics:
<i>…</i>— generally only used where italics are grammatically correct i.e. foreign languages, names of books etc. - strong:
<strong>…</strong>— This is used instead of bold in almost all cases. - bold:
<b>…</b>— very rarely used. - br:
<br/>— an exception to the opening/closing tag rule, abr(break) is a line break that goes at the end of a line where you want it to break (as opposed to a break created by a paragraph). The forward slash at the end indicates it is acting as both an opening and closing tag. - hr:
<hr/>— another exception to the 2-tag rule. The hr (horizontal rule) tag is used to indicate section breaks that are usually shown by a white space or glyphs (e.g. * * * ) in a printed book. - abbr:
<abbr>Mr.</abbr> James <abbr>H.</abbr> Smythe-Jones— Indicates abbreviations, all of which should be marked appropriately in Standard ebooks — otherwise how would a screen reader know who to pronounce them? (See section 8.10 of the manual for different types of abbreviations like acronyms or initialisms.) - blockquote: Essentially a ‘block’ that is formatted to stand out from the rest of the text e.g. a letter or a sign
 <blockquote>
      <p>To my buddy Cheryl,<br/>
      Wherever she may have ended up.</p>
 </blockquote>
- span:
<span>…</span>— generally used mid-sentence to surround something you might want to add information to when it isn’t appropriate to use any of the above tags e.g.<span epub:type="z3998:roman">II</span>. We will get into classes next.
So the following code in html…
<h2>This is an h2</h2>
	<p>This is paragraph one. This is <b>bold</b> and this is <i> italic.</i></p>
	<p>This is paragraph two. This is <strong>Strong</strong> and this is <em>Emphasis (em).</em></p>
	<blockquote>
		<p>And of course, this is some text set aside in a blockquote.</p>
		<p>There may be multiple paragraphs in a given blockquote.</p>
	</blockquote>
…will render to something similar to this:

CSS & Classes
Many tags accept additional parameters which are part of the CSS (Cascading Style Sheet) file. The CSS style sheet is where Standard Ebooks specifies such things as the size of the p’s first line indent or top and bottom margins.
A Standard ebook usually has 3 style sheets (core.css, se.css, and local.css) found in the css folder. The only one you as a producer will ever touch is local.css — at the beginning of the project it will be empty.
Briefly, the purpose of css is to define the overall style of the publication and then allow you to add “custom” styles to individual tags and blocks of text. For example if you want the signature line of a letter to be right justified you could enclose that line in a p tag and add a class: <p class=“signature”>Bob Smith</p>. To add the right align you would then add the appropriate css to the local.css stylesheet:
.signature{
    text-align: right;
}
But don’t worry. All of the necessary css for a beginner is detailed in The Standard Ebooks Manual of Style and is simply a matter of cutting and pasting.
Semantics
Adding specific classes to specific text is a huge part of a Standard ebook production, in general referred to as semanticating. Adding semantics to individual parts of the text is very important to the well-formed nature of the final product and takes a lot of time and close reading to get correct, especially in more complex productions like plays or epistolary texts. Most of it is done automatically and often your only job is to check it is done properly. More about that later.
Ebook Structure
We talked about what an ebook is: essentially a self-contained website. The constituent files have been compressed into an archive that forms the basic epub file. When you start a new Standard ebook project a basic template with all the necessary files will be created for you, but here is a brief description of the parts you will need to understand:
- content.opf — This is the file that houses most of the metadata about the book and contains the “manifest” which details all the constituent parts of the ebook and the “spine” which sets out the reading order.
- css folder — Contains all the css files to control how the book looks. Remember you will only ever edit the local.css file.
- images folder — Contains the cover image (which is generated as one of the production steps).
- toc.xhtml — The Table of Contents. Automatically generated but very occasionally will need to be tweaked.
- text folder — Contains the text files for your project including several standard files common to all Standard ebook projects: titlepage.xhtml, imprint.xhtml, chapter-1.xhtml etc.
xhtml
As stated, an ebook is made up of many xhtml files. Each file represents a section of the book: Title page, chapter, endnotes etc. While an xhtml file may look complex and a bit indecipherable they really are just made up of logical sets of nested text. Depending on the text editor you use it will often colour code the various bits to make it easier to separate everything. Some editors will have a little arrow on the right side that will allow you to hide all the text between two tags—this makes it all a lot less cluttered looking. This is a collapsed version of the page seen below:

What an ereader does is parse the text document according to the tags you have specified and whatever metadata you have in your content.opf and displays it in a more familiar fashion.

Code view

Epub view
It is helpful to realize that if you open an xhtml file in your web browser it will appear just like a web page — handy for proofing and checking if and where any errors might be lurking.
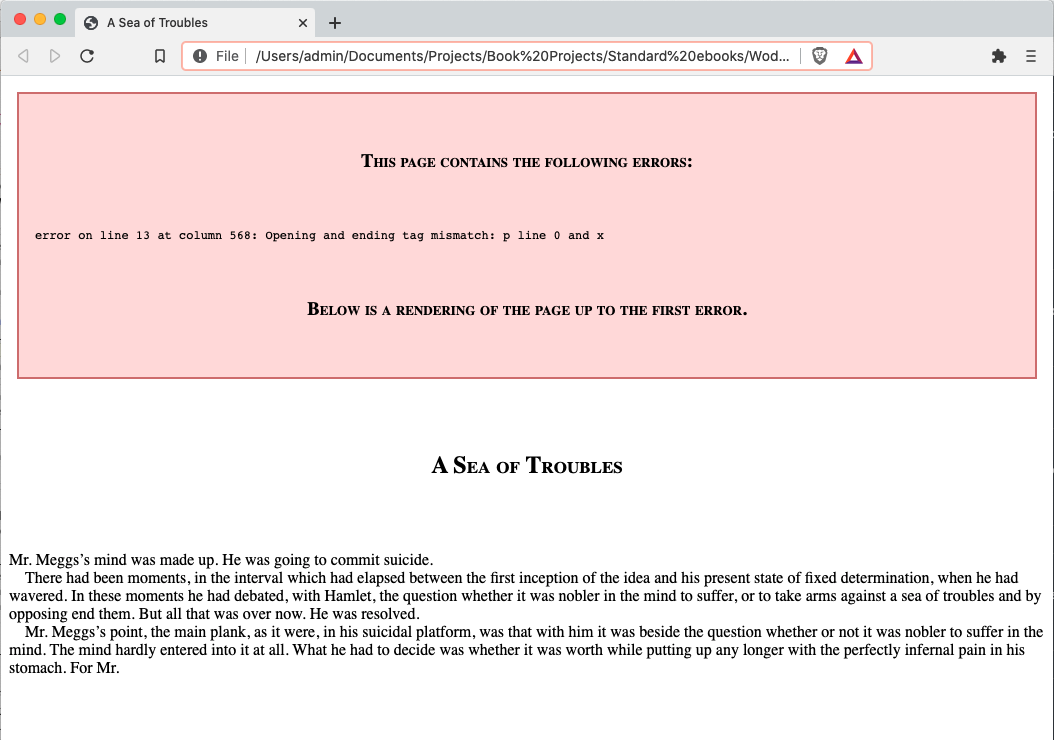
Sometimes using a web browser can be a convenient way of finding errors.
Basic file structure
Each individual xhtml file will follow a strictly hierarchical structure. The indents are used to indicate the various levels of each unit in relation to each other. The se toolset includes a handy tool called ‘clean’ which will go through the whole document and set the appropriate level of indent so while it is important to try and keep things organized as you work, you can always run the command whenever you need to in order to get things where they need to be.
- html wrapper — The whole document will be enclosed in a set of
<html>…<\html>tags. This will also contain such things like language and which “official” formats the file adheres to.- head — The first section will be in a
<head>tag. This generally declares the title of the file, and where to look for the appropriate css files. - body — The body is the part that holds the text that will be displayed. It generally also declares what the section the file appears in e.g. frontmatter, bodymatter, backmatter etc.
- section — Within the body matter will be a <section> which will have an id such as imprint, chapter-1, appendix etc. Occasionally there might be internal sections such as scene 1, scene 2 in which case there might be several internal sections (see example below).
- header/title — Most documents will then have a
<h2>(header, level 2) header. This will be the chapter title or chapter number as displayed in the text. - paragraphs — the next section is the individual paragraphs that make up the body.
- head — The first section will be in a
<section id="scene-1-1" epub:type="z3998:scene">
	<p>…</p>
	<p>…</p>
</section>
<section id="scene-1-2" epub:type="z3998:scene">
	<p>…</p>
	<p>…</p>
</section>
Metadata
Metadata appears in the content.opf file. If you open up the base file included in the Standard ebook file you will see lots of line of tagged code. Some of it you will need to fill in at the end of the project. This is indicated by the ALL_CAPS and underscores in place of spaces:
	<dc:contributor id="producer-1">PRODUCER</dc:contributor>
		<meta property="file-as" refines="#producer-1">PRODUCER_SORT</meta>
		<meta property="se:url.homepage" refines="#producer-1">PRODUCER_URL</meta>
Quick Hint — text is formatted this way means so you can generally select it as one word by double clicking on it.
The main sorts of metadata you will be responsible for adding will be a book description, category tags, your sources for text, the cover artists details, and your information. There are rules in the Manual for all of this and you can always check other books for how special cases have been dealt with.
Output File Types
Once your project is complete you will run a build command to build the folders into an ebook that you can proofread. Additional error checking will also happen at this stage and it is not unusual to catch an error at this point that wasn’t previously caught by other tools.
- The build will create 4 files: an epub, kepub, azw3 and advanced pub (epub3). Depending on your reader you can check the one that is most applicable to you.
Wrap up
That’s a lot. But it really is very logical and rule bound. The rules can be come a bit convoluted (especially when dealing with complex css) but no more so that English grammar so it’s just a matter of learning the basics and checking back with Manual as much as necessary and some time even more than that.
Take a break and rest your mind!
The Computer Stuff ↺
Python, Brew and the Command line
This is the programming/computer stuff. Don’t despair — it’s not actually as daunting as it seems. Cut and paste is your friend, and along the way you will continue to build on your knowledge until soon you can strikeout on your own :-)
Terminal
Most of the Standard ebook tools are not housed in a GUI (Graphical User Interface) — the thing you point and click with your mouse. You will need to become fairly comfortable with the terminal interface to work on a project. But again, it’s mostly cut and paste from the Manual so as soon as you adjust to the interface it is pretty simple.
Hint: if you triple click on a command in the Step-by-Step it will select the line you need. Keyboard commands are your friend. So if you triple click a command, then hit cmd-c, cmd-tab, cmd-v and then enter you can efficiently accomplish a step without having to expend too much effort.
- triple click: select paragraph/line
- cmd-c: copy
- cmd-tab: switch to previous window (presumable the terminal)
- cmd-v: paste
- enter: execute the command
On a Mac Terminal can be found by searching for terminal using Spotlight (Cmd+space) or by navigating to to Applications: Utilities and double clicking on the Terminal icon.
![]()
We will talk more about this later, but you will need to use this application in order to install the tools.
Brew
To install and maintain the tools on a Mac you use the Homebrew package manager. Homebrew is similar to an “app store” — it is basically non-gui software that does the heavy lifting of installing and updating for you. There are instructions on the tools Github (more on Github in the next section) to get up and running. In a nutshell you will copy the command from the website into terminal and hit enter. At this point this is the command (but it may change so be safe and copy it from the website):
/bin/bash -c "$(curl -fsSL https://raw.githubusercontent.com/Homebrew/install/HEAD/install.sh)”
It will take some time, all the while your terminal will be spitting out lines and line of gibberish. Just ignore it and have a nice cup of tea or coffee.
Python
Standard Ebooks has a toolset that is based on the Python programming language. When you install the Standard Ebooks tools it will install the latest version of Python 3 for you, so dinnae fash yersel as the Scots might say.
Just follow the step-by-step in the tools repository README.md. Remember it’s all cut-and-paste.
brewcommands install the support software that the tools need to usepipxcommands install the python programssudois a terminal command that allows the the install to take place at root level i.e as an administrator. It will likely ask for your password for permission.
I would ignore the Optional elements at the this point unless you know what they mean.
From time to time you be required to update the SE software as new versions come out. You will find out about these on the Google mailing list.
sudo pip3 install --upgrade standardebooks
Github
Github is a website that employs Git, a source control system. Normally used as a way of managing source code for computer programs (and if you think about it, that’s what making an ebook essentially is), it’s what Standard Ebooks uses to manage and control the various projects. I am a real noob at using Git and Github and I frequently have to resort to using google-foo to figure out how to fix what I did wrong.
In a nutshell, Git is a process to exercise version control over your project and Github is a website that allows you store this online. You create an initial repository with the folder containing your files and as you move through the steps, you sync your local version to the GitHub website. This allows you to keep track of the steps you have taken and, more importantly, to revert any changes you made that weren’t appropriate or were outright mistakes. The repository is usually referred to as the repo.
You will have to create a GitHub account. It’s pretty standard and once you are signed up you will have your own place to store your work as you progress.
When a project is finalized and approved then Standard Ebooks will clone it to their own GitHub repository in preparation to publishing. Incidentally those repos give you access to all the ebooks that have been already published, providing a plethora of examples on how to solve all sorts of issues and special cases.
A brief introduction to Regular Expressions (regex)
Regular Expressions, generally known as regexes, are, roughly speaking, a way to search and manipulate text through a series of wildcards and pattern matching. I will freely admit that, while I am pretty bad at constructing proper regexes, I am a huge fanboy. Imagine being able to replace every instance of a particular word in the first paragraph of a chapter across multiple files with Title Case. It saves a whole lot of legwork. Standard Ebooks step by step includes a bunch of regexes to replace a lot of manual labour, and you can quickly learn to build some yourself.
More on this later. Much more.
Ok enough background. I remember this making my head explode way back when, but remember it’s made a lot easier by the range of tools you use to manage everything. Which is what the next section is about.
But to review:
- ebooks are essentially packaged websites
- xhtml is easy—just give it a chance to grow on you.
- Standard Ebooks are designed to be well-formed and accessible
- Python can be as simple as cut & paste.
- Github will try to be your friend. Let it.
Tools ↺
Ok. Now we are into the meat of it. This is my setup. There are many ways to skin this particular furry mammal but this is what I use. Try to remember that each tool can be approached by ignoring 90% of its functionality and then you can add in bits and pieces as they start to make sense.
BBEdit & Text Editors
BBEdit is a text editor. Unlike word-processing programs like Word or Pages, which are designed to produce formatted documents, text editors just edit plain text, like the XHTML code we will use for the SE book. There are a lot of other options (Visual Studio Code, Brackets etc.), all of which are more or less free. I’ve also had VS Codium recommended and it has the added benefit of working on a Windows or Linux machine.
And, in case you haven’t figured it out, editing text is a large part of what making an ebook is about. And editing text means exactly that: you will be editing raw text. Not rich text with bolds and italics and definitely not word processor text with all sorts of hidden code. Raw ASCII text.
The advantage of BBEdit (or other code/xml editors) is that it allows you to work more efficiently — you can do things like open entire folders in one window, do regex-based search-and-replaces across the entire project or see hidden characters like spaces and tabs (very important that last one). It’s a tool mostly designed to doing exactly this job — so why not use something that will bring added functionality the process? I use the free version—there is very little reason to upgrade to the paid one. (Note: since originally writing the last sentence I have broken down and bought the paid version. While it provides some cool features it is not really helpful in working on a Standard ebook project.)
Github Desktop
As I mentioned above, you will have to use Github. Access to Github is usually managed by “real” coders using the command line. It is one of the more arcane processes when working on a SE project — frankly it almost made me give up when I first started. Thankfully I found Github Desktop which is a GUI interface, which brought most of the process back to the click-my-mouse world and that made my life a lot easier.
Github Desktop provides a visual/graphical tool to manage your repository. I pretty much ignore the command line when using git and GitHub these days. The general sequence is that any changes you make in a file will be represented in the Github Desktop GUI. You elect which files you want to sync; give that selection a name (e.g. initial commit or fixed typo) and then “commit” it. Then you can “push” the various commits up to the website or undo them.

The red highlighted text above was the original, the green highlighted text contains the sole change I made between versions. This can be really helpful and in fact makes at least one of the steps in the official step-by-step redundant.
I will take a look at some of the basic concepts surrounding using Git in Part II.
Terminal
On a Mac the command line interface is accessed through a program called Terminal. Simply hit cmd+spacebar and type “terminal” or go to Applications: Utilities and double click on the Terminal icon.
Terminal is an app like any other, but it opens a window into the functions that underpin how your computer works. Anyone who remembers the DOS days will already be familiar with the concept. You will use it a lot so adding it to your Dock wouldn’t be the worse idea.
It’s helpful to know a bare minimum of Terminal commands. Depending on how old your OS is you will likely be using bash or zsh as your shell (this is inherited from the unix underpinnings of OSX) but you don’t really need to know about that beyond perhaps wanting to google “bash how to change directory” or something similar.

When you open Terminal it will give you a prompt similar to bob@my-mac ~ %. As I said the exact prompt will vary from shell to shell. You will generally start in your user/home folder. If your user name is Bob then it will be in the Bob ‘home’ folder. Typing ls (list) and hitting enter will list the folders and files so you can check if that’s where you are—you can compare it to the Finder window and should be able to see exactly the same files and folders.
Basic terminal commands
lslist — lists files and folderscdchange directory (followed by the directory you want to change to) — allows you to change your directory. For examplecd /bob/Documents/Projectswould switch you to the Projects folder found in your Documents folder. Just like if you had double-clicked on the Document folder and then double-clicked on the Project folder.- Don’t panic! You can — and I always do — simply type
cdfollowed by a space and then drag the folder you want to be in from the Finder onto Terminal and, voila, you have the correct path name automatically ready for you to hitenter. Saves on the frustration.
- Don’t panic! You can — and I always do — simply type

cd ..Change directory up one level. If you are in /Projects/Bob’s Book and you want to be in /Projects/ this will do the trick.
Note: One of the gotchas when using terminal on a Mac is spaces and special characters. If you try typing
cd Bob’s Booksit won’t work. That’s because Terminal won’t recognize the space or the apostrophe. You would need to “escape” the special characters with a backslash ():cd Bob\’s\ Books. It’s one of the reasons I generally use the drag folder into terminal method.
And finally there is a whole raft of Standard ebook commands that are again cut and paste from the guide. Here’s a common one:
se clean .This tells terminal to use thesetoolset, find the commandcleanand apply it to all the files and folders in the current directory.. (Make sure you are in the right directory!) You will primarily be using Terminal to invoke these sorts of SE toolset commands. This one cleans up the files, removes extraneous spaces and returns and then lines everything up neatly.
Preview/Photoshop/GIMP
The last tool you will have to use is an image editor. All you really need to use it for will be to crop the final cover image to exactly 2100 pixels by 1400 pixels, but occasionally you might want to colour correct the image a bit or edit out a bad scratch.
This can be done easily enough using Mac’s built in image viewer Preview.
I have Photoshop as a part of my working suite but GIMP is a totally free and open source image editor that is pretty highly regarded. This isn’t 100% necessary and there are lots of online tools like Pixlr that you could use instead, but it’s part of my everyday workflow so I’ve never bothered to look for other ways to do it.
Ebook Reader
Of course it always good to have a stand alone ebook reader (i.e. a Kindle or a Kobo) to try out your projects on but a desktop one is easier (in my opinion) to use when proofing. I generally use the built in Apple Books, but occasionally also use the Calibre ebook reader built into the excellent Calibre e-book Management software. There are plenty of options out there.
Get Started ↺
So. Time to start. First off you need to subscribe to the Standard Ebooks Google Group which is where 99% of the communication back and forth happens.
Then you need to visit Wanted Books page and find a book that appeals to you from the First Production section. Alex (and everyone else who has reviewed a book project) will strongly discourage you from choosing a book that isn’t on the list for a first project. Not only do you have to learn all the ins and outs, but a reviewer has to go through a first-time production more closely to ensure you’ve done everything correctly. The longer and more complex the book, the harder it is for both parties. After you’ve done your first project successfully you will likely be invited to try something a bit harder.
Start a new thread in the Google Group and send off a note with your chosen book and wait (patiently) to see if it’s approved. Then you are on your way and can follow the Step by Step.
For your first projects you should start by following the provided Step by Step closely, feeling free to ask questions as often as necessary. People are generally pretty helpful with beginners but a lot of it can be found in the manual if you look there first.
On to Part 2: How To’s
Modified October 13, 2025 — 10:04 AM